Kevin Bacon is an American actor and subject of the trivia game Six Degrees of Kevin Bacon, in which you try to connect any actor or actress in any film with Kevin Bacon via co-stars in other films. The number of connections is also known as the Bacon Number.
I first stumpled upon this game many years ago, before learning about graph theory at school. Besides playing it a lot with friends, I was fascinated about how it worked and wanted to build something similar. Fast forward to today, and having recently worked with Azure Cosmos DB and its graph model, I finally set about to try and realize my goal…
🎄 This blog post is part of the F# Advent Calendar 2019. I also participated in 2017 with The soccer player best suited to be Santa Claus.
Six Degrees of Kevin Bacon
The game is based on the concept of six degrees of separation in which it is believed that all people are six or fewer social connections away from each other. Six Degrees of Kevin Bacon applies the same concept to the film industry and assumes that any actor or actress can be linked to Kevin Bacon through their film roles in six steps or less. Who better to explain it than Kevin Bacon himself…
Kevin Bacon initially disliked the game because he felt it ridiculed him, but eventually came to appreciate it and even used it as an inspiration to start a charity.
Data is King 👑
The original game, The Oracle of Bacon, used data from the Internet Movie Database (IMDb), but currently works by downloading and parsing articles from Wikipedia.
I didn’t feel like downloading and parsing articles from Wikipedia and unfortunately IMDb doesn’t offer a suitable API (probably why the original game switched), so I went looking for alternatives. I ultimately decided on using a data set from Kaggle as the APIs I found were limited.

The downsides to the data set, 350 000+ movies from themoviedb.org, are that the data is stale and was last updated 2 years ago. Also, there is no unique identifier for actors, so unable to differentiate actors with the same name and every movie in the data set has a maximum of 5 actors or actresses.
It’s not just good, it’s good enough! - Krusty the Clown
Picking the Right Data Model
Relational databases once ruled the world of persistence and although well suited for many applications, the organization of data into tables with columns and rows doesn’t fit every problem.

The data model to use should be based on how the data is to be used. In this case, the object is to find relationships between actors/actresses and movies, so the data will be highly interconnected. Implementing this using a relational model with foreign keys and (many) joins would result in so called “join pain” and poor query execution time.
Graph databases, on the other hand, work by storing the relationships along with the data. This makes accessing those relationships as immediate as accessing the data itself. In other words, instead of calculating the relationship as relational databases must do, graph databases simply read the relationships from storage. Satisfying a query is simply a matter of walking or “traversing” the graph.
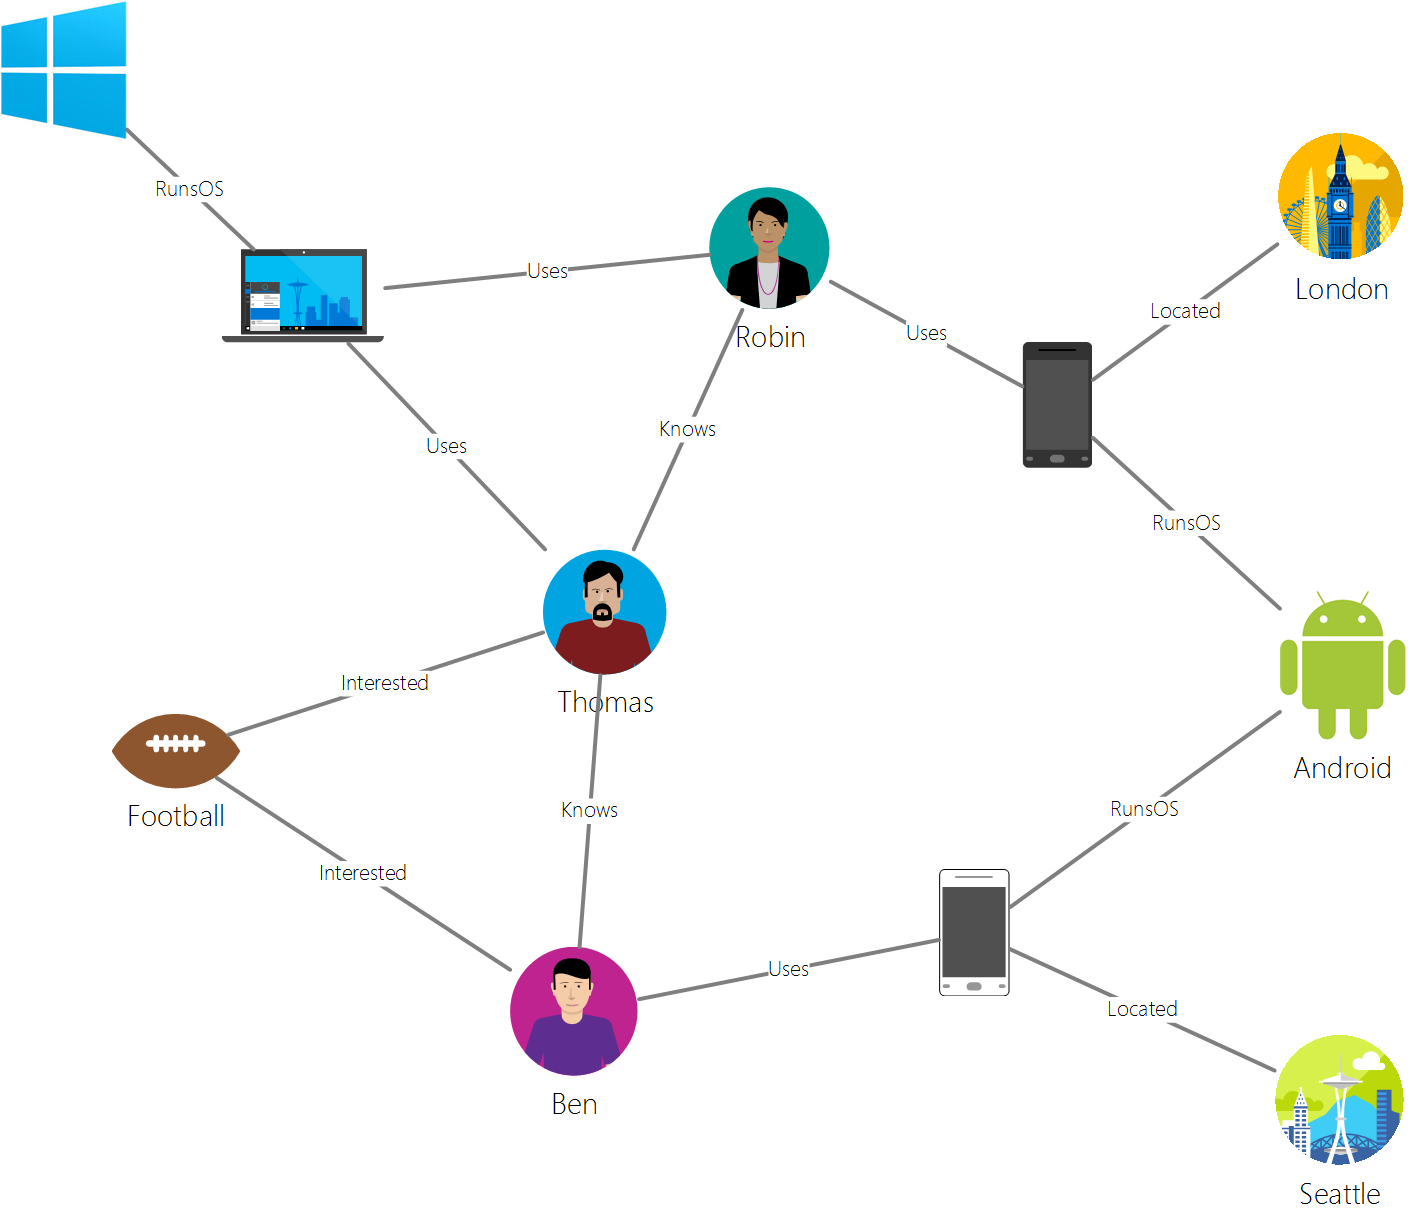
This fits perfectly with how I want to use the data, so graph model it is. One thing worth noting, is that the above graph is actually a directed graph, meaning that each edge can be followed from one vertex to another, e.g. Ben uses Phone and not the other way around.
Azure Cosmos DB
Azure Cosmos DB is Microsoft’s globally distributed, multi-model database service. Internally, it uses an atom-record-sequence (ARS) system and with this supports multiple models such as key-value pairs, column family, document and graph.
The models are exposed through different APIs and here I’ve used the Gremlin (graph) API. More about this API later.
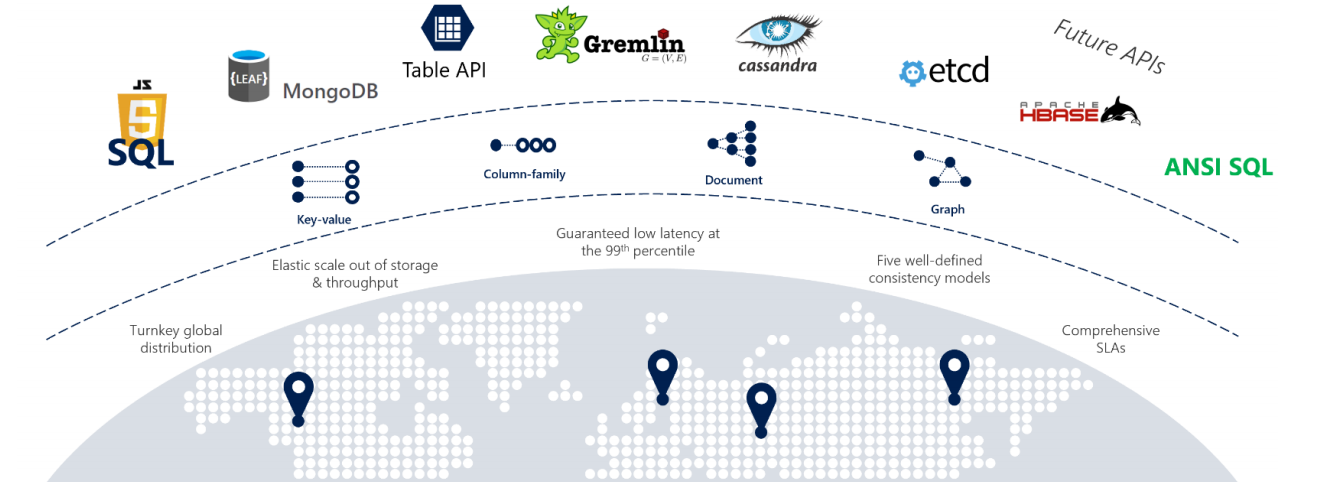
I elected to try Azure Cosmos DB for free. This requires no Azure sign-up and and gives 30 days of free access to try out experiments.
Bulk importing into Azure Cosmos DB
The data set is called 350 000+ movies from themoviedb.org, but actually “only” contains data for 329 044 movies 🤔 There are multiple CSV files in the data set, but I only used the following:
- AllMoviesDetailsCleaned.csv - 127 MB. Used the columns
idandoriginal_title. - AllMoviesCastingRaw.csv - 34 MB. Used the columns
id,actor1_name,actor2_name,actor3_name,actor4_name,actor5_name.
The id columns link movies and cast. As mentioned earlier, there is no unique identifier for cast, only names, which makes it impossible to differentiate between actors or actresses with the same name. And also, a maximum cast of 5.
To parse the data, I used the CSV Type Provider, which is one of many type providers in the awesome F# data library. I keep coming back to this library when experimenting with data and wanting to access it in a strongly typed way ❤️
An F# type provider is a component that provides types, properties, and methods for use in your program. Type Providers generate what are known as Provided Types, which are generated by the F# compiler and are based on an external data source.
- Microsoft Docs - Type Providers
Parsing the movies is straightforward. Read all lines in the data file, parse to vertexes and convert to objects. Objects as this is the input type used by the import function to be called later.
type Movies = CsvProvider<"AllMoviesDetailsCleaned.csv", ";", IgnoreErrors=true>

let buildMovieGraphElements (movie: Movies.Row) =
    let vertex = GremlinVertex(movie.Id |> string, "movie")
    vertex.AddProperty("name", movie.Original_title)
    vertex |> box

let movieGraphElements =
    Movies.Load("AllMoviesDetailsCleaned.csv").Rows
    |> Seq.map buildMovieGraphElements
Parsing the cast is similar, but with additional steps. For each row, a vertex is constructed for every actor or actress and an edge (connection) is constructed to the given movie.
type Cast = CsvProvider<"AllMoviesCasting.csv", ";", IgnoreErrors=true>

let buildCastGraphElements (cast: Cast.Row) =
    let buildVertex actorName =
        let vertex = new GremlinVertex(actorName, "cast")
        vertex.AddProperty("name", actorName)
        vertex |> box

    let buildEdge actorName movieId =
        let edge = GremlinEdge(Guid.NewGuid().ToString(), "acted in", movieId, actorName, "movie", "cast")
        edge |> box

    let actorNames =
        [ cast.Actor1_name; cast.Actor2_name; cast.Actor3_name; cast.Actor4_name; cast.Actor5_name ]
        |> List.filter (fun actorName -> actorName <> "none")

    let vertexes =
        actorNames
        |> List.map buildVertex

    let movieId = cast.Id |> string

    let edges =
        actorNames
        |> List.map (buildEdge movieId)

    Seq.concat [ vertexes; edges ]

let castGraphElements =
    Cast.Load("AllMoviesCastingRaw.csv").Rows
    |> Seq.map buildCastGraphElements
    |> Seq.concat
After constructing all the vertexes and edges, I used the Azure Cosmos DB BulkExecutor library for .NET for importing the graph elements. While working on this blog post, Bulk support was introduced in the Azure Cosmos DB .NET SDK, so there is no need to use the Azure Cosmos DB BulkExecutor library going forward as it will most likely be deprecated.
let serviceEndpoint = Uri("https://c747c2fd-0ee0-4-231-b9ee.documents.azure.com:443/");
let authKey = "retrieve-from-azure-portal"

let client = new DocumentClient(serviceEndpoint, authKey)
client.CreateDatabaseIfNotExistsAsync(Database(Id = "database")) |> Async.AwaitTask |> Async.RunSynchronously |> ignore
let collection = client.CreateDocumentCollectionIfNotExistsAsync(UriFactory.CreateDatabaseUri("database"), DocumentCollection(Id = "graph")) |> Async.AwaitTask |> Async.RunSynchronously

let graphBulkExecutor = GraphBulkExecutor(client, collection.Resource)
graphBulkExecutor.InitializeAsync().Wait()

let graphElements = Seq.concat [ movieGraphElements; castGraphElements; ]
graphBulkExecutor.BulkImportAsync(graphElements = graphElements, enableUpsert = true) |> Async.AwaitTask |> Async.RunSynchronously |> ignore
If importing a large amount of data, I recommend creating the database and graph upfront to adjust the throughput (RU/s) before starting the import. Otherwise you could quickly run into 429 Too Many Request responses from the Cosmos DB service. The bulk feature has retry functionality built-in, but without adjusting the throughput, the processing will be slower.
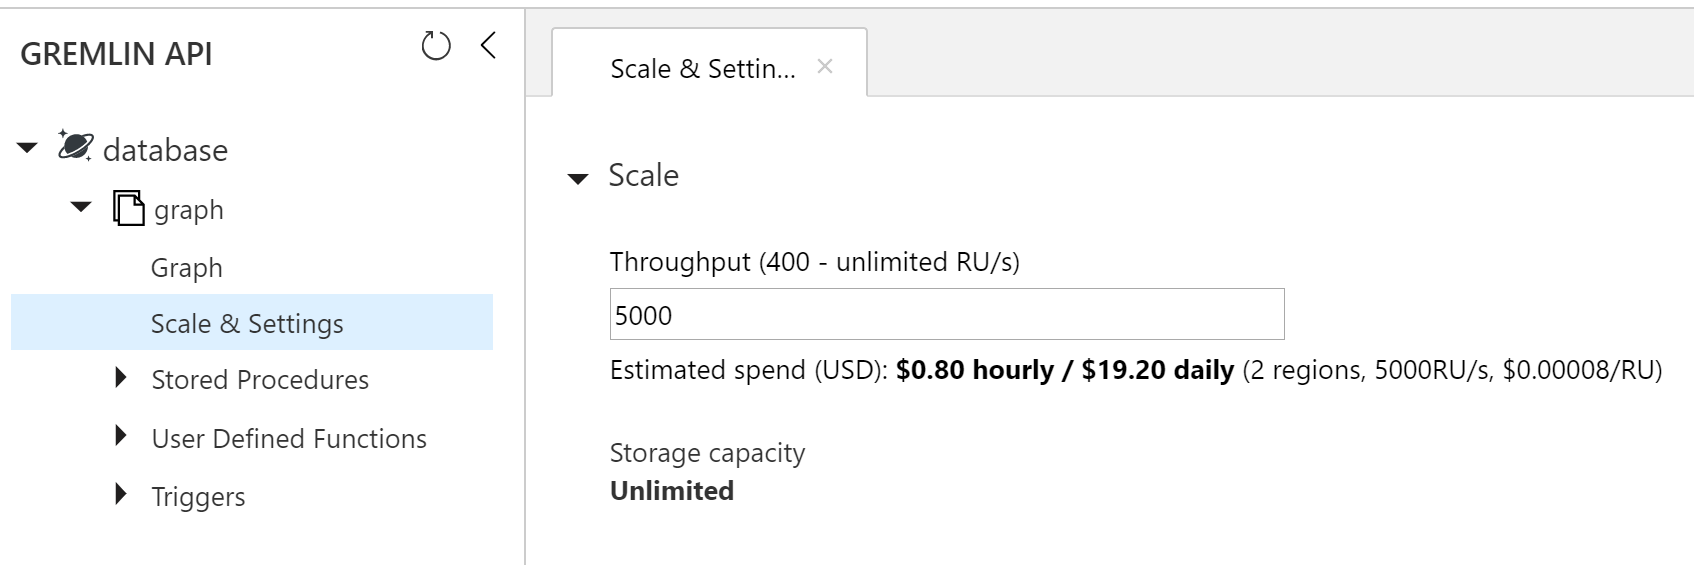
With the throughput maxed out at 5000 (limit per container) I still experienced some 429s and the import took about half an hour. My free Cosmos DB was created in the region East US 2 by default, which is quite a distance from my location in Norway and undoubtedly had an impact on the time.
The result of the import was a graph consisting of:
- 328 220 movies, vertexes labelled movie.
- 260 860 actors or actresses, vertexes labelled cast.
- 851 040 connections, edges labelled acted in.
329 044 movies in the data set, so 824 movies not imported due to invalid data when parsing.
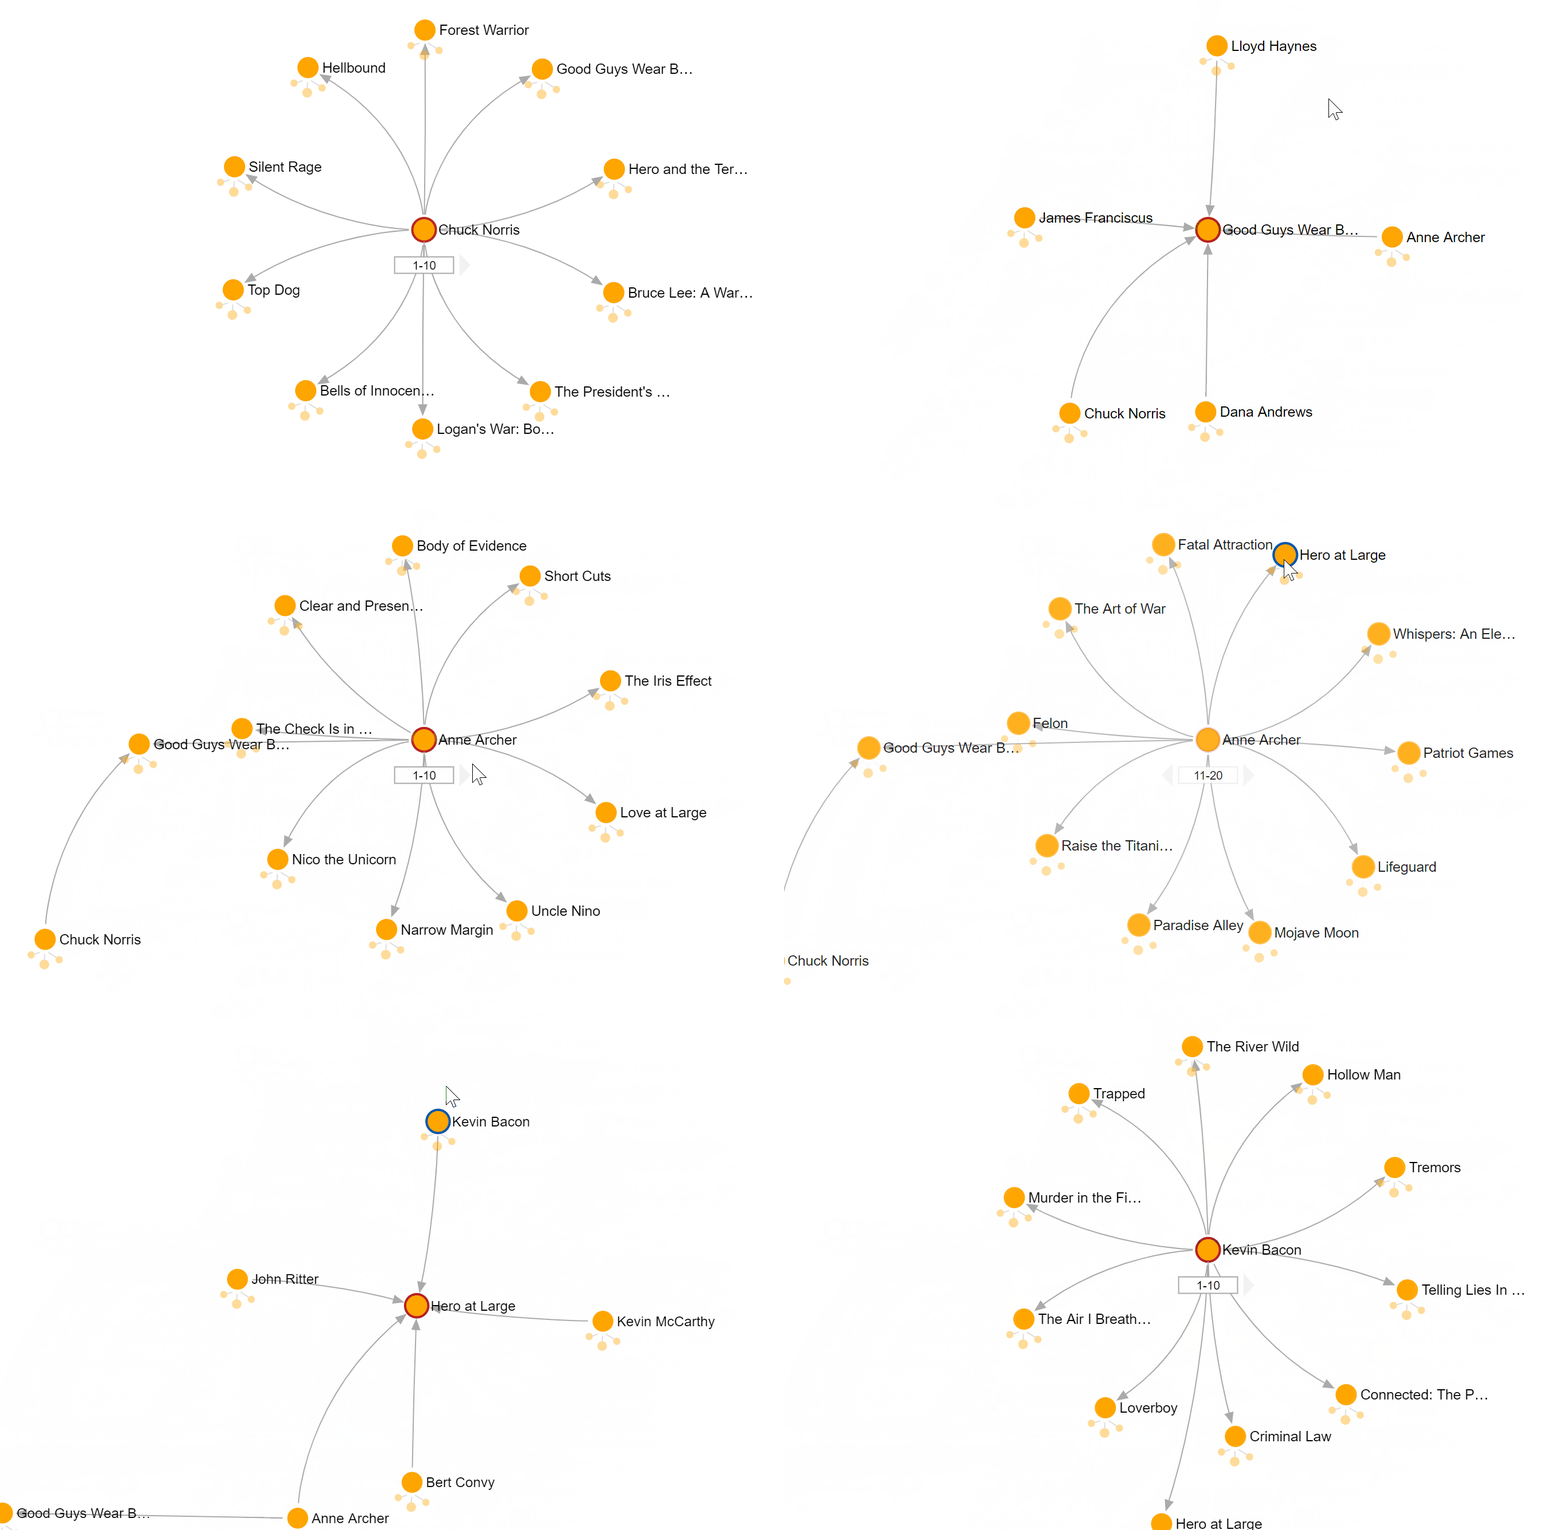
The Azure Cosmos DB explorer is a web-based interface where you can view and manage data stored in Azure Cosmos DB. Below I’ve found Chuck Norris and clicked my way to Kevin Bacon. Revealing that the Bacon Number for Chuck Norris is 2:
Querying Azure Cosmos DB using Gremlin
Retrieving data from a graph database requires a query language other than SQL, which was designed for the manipulation of data in a relational system and therefore cannot “elegantly” handle traversing a graph. At the time being, there is no official query language and different languages are used for different products. Work is in progress to create GQL as a new open industry standard, but currently the Azure Cosmos DB API is based on the Apache TinkerPop standard, which uses the Gremlin graph traversal language.
The following Gremlin query returns one shortest path from the vertex with the id Chuck Norris to the vertex with the id Kevin Bacon:
g.V('Chuck Norris').repeat(out().in()).until(hasId('Kevin Bacon')).path().limit(1)
The path is returned as the following JSON:
[
  {
    "labels": [
      [],
      [],
      [],
      [],
      []
    ],
    "objects": [
      {
        "id": "Chuck Norris",
        "label": "cast",
        "type": "vertex",
        "properties": {
          "name": [
            {
              "id": "dc69709d-2ec9-40ef-8528-cf1172de4af6",
              "value": "Chuck Norris"
            }
          ]
        }
      },
      {
        "id": "42205",
        "label": "movie",
        "type": "vertex",
        "properties": {
          "name": [
            {
              "id": "c6e484fa-29e4-4176-b5a3-bbb93a7c2d7c",
              "value": "Good Guys Wear Black"
            }
          ]
        }
      },
      {
        "id": "Anne Archer",
        "label": "cast",
        "type": "vertex",
        "properties": {
          "name": [
            {
              "id": "77c1d926-f04b-48be-8577-2988738eb464",
              "value": "Anne Archer"
            }
          ]
        }
      },
      {
        "id": "44004",
        "label": "movie",
        "type": "vertex",
        "properties": {
          "name": [
            {
              "id": "0c87fb23-83a3-4d58-a4a7-105a9fd6f2af",
              "value": "Hero at Large"
            }
          ]
        }
      },
      {
        "id": "Kevin Bacon",
        "label": "cast",
        "type": "vertex",
        "properties": {
          "name": [
            {
              "id": "f489083a-7c86-4e19-8596-958f7bde45ac",
              "value": "Kevin Bacon"
            }
          ]
        }
      }
    ]
  }
]
The above illustrates the power of a graph model compared to a relational model and with that we can proceed to build a Web API and corresponding user interface.
SAFE
I previously blogged about Fable in Fablelous Enterprise Tic-Tac-Toe. Fable is a F# to JavaScript transpiler that brings all the good parts of functional programming to JavaScript development. The SAFE stack takes it a step further and brings together several technologies, one of them being Fable, into a single coherent stack for building web-based applications in F#. The SAFE acronym is made up of four separate components:
- Saturn extends Giraffe, a functional micro web framework built on top of ASP.NET Core.
- Azure is Microsoft’s set of cloud services and the default option used for hosting with SAFE.
- Fable is a F# to JavaScript transpiler that makes it possible to run F# in the browser.
- Elmish allows for building Fable apps with the model-view-update pattern made popular by Elm.

The above components are default, but the SAFE stack is flexible and allows for swapping out the various componenets for others.
Getting started
The quick start in the SAFE documentation is easy to follow:
- Install the pre-requisites.
- Install the SAFE project template.
- Create new directory, e.g.
BaconNumber, and change directory into it. - Create a new SAFE project with the command
dotnet new SAFE --server giraffe --communication remoting - Build and run the project with the command
fake build --target run.
Point number 4 is a good example of the flexibility SAFE offers. Here I moved away from the defaults by specifying other options for server and communication. More on why I did this later.
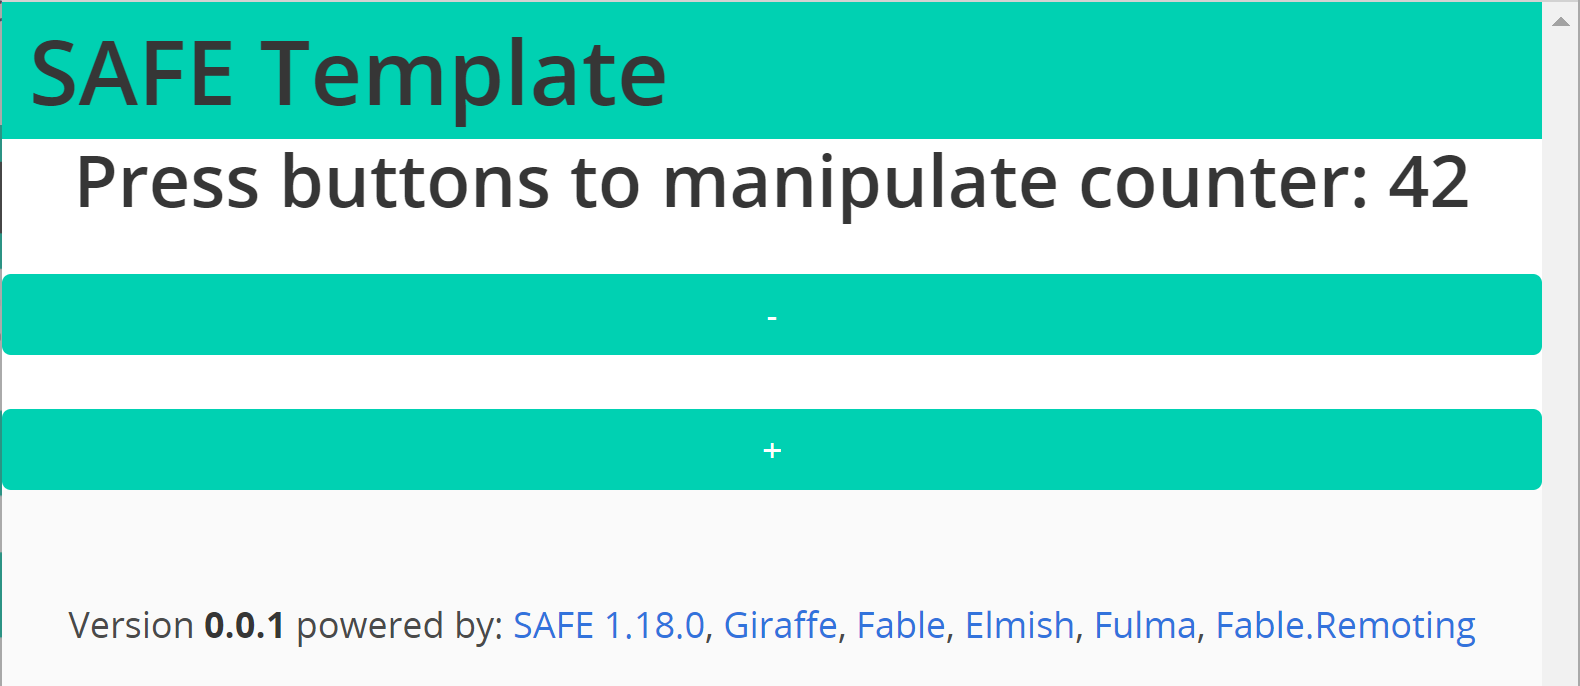
That’s it! A SAFE application running in the browser with full support for .NET Core and hot module reloading.
Sharing is Caring 🤗
One of many nice features in SAFE is the ability to share code, such as types and behavior, between server and client. In addition to sharing code, several technologies are available for doing so, each with their own strengths and weaknesses. See Sharing Overview for more details.
I used Fable Remoting as it provided an excellent way to quickly get up and running, and had type-safety between client and server. It excels for prototyping since JSON serialization and HTTP routing is handled by the library.
The shared types are included in a file that is added to both the client and the server project, thus defining a contract between them. The shared types for this blog post is:
type Vertex = {
  Type: string
  Name: string
}

type SearchText = SearchText of string

type ISearchApi =
  {
    search : SearchText -> Async<List<Vertex>>
  }
Simply an endpoint called search that takes in a search text (name of actor or actress) and returns a list of vertexes.
The API
Saturn provides a nice set of abstractions, but those were not needed for this blog post, so I opted out by specifying --server giraffe when creating the SAFE app. Giraffe is the micro web framework that Saturn extends.
The result of a query against Azure Cosmos DB is returned as JSON, so once again I turned to the F# Data library and a JSON Type Provider to parse the data.
type CosmosDb = JsonProvider<"""[{"labels":[[],[],[],[],[]],"objects":[{"id":"Chuck Norris","label":"cast","type":"vertex","properties":{"name":[{"id":"dc69709d-2ec9-40ef-8528-cf1172de4af6","value":"Chuck Norris"}]}},{"id":"42205","label":"movie","type":"vertex","properties":{"name":[{"id":"c6e484fa-29e4-4176-b5a3-bbb93a7c2d7c","value":"Good Guys Wear Black"}]}},{"id":"Anne Archer","label":"cast","type":"vertex","properties":{"name":[{"id":"77c1d926-f04b-48be-8577-2988738eb464","value":"Anne Archer"}]}},{"id":"44004","label":"movie","type":"vertex","properties":{"name":[{"id":"0c87fb23-83a3-4d58-a4a7-105a9fd6f2af","value":"Hero at Large"}]}},{"id":"Kevin Bacon","label":"cast","type":"vertex","properties":{"name":[{"id":"f489083a-7c86-4e19-8596-958f7bde45ac","value":"Kevin Bacon"}]}}]}]""">
The implementation of the search API as defined by the contract (shared type):
let searchApi = {
    search = fun (SearchText(text)) -> async {
        let ToVertex (o: CosmosDb.Object) =
            let label = o.Label
            let name = o.Properties.Name.[0].Value
            let vertex = { Type = lab   el; Name = name }
            vertex

        let host = "c747c2fd-0ee0-4-231-b9ee.gremlin.cosmos.azure.com"
        let authKey = "insert-key-here"
        // Todo: Parameterize text input.
        let query = String.Format("g.V('{0}').repeat(out().in()).until(has('name', 'Kevin Bacon')).path().limit(1)", text)

        let graphClient = new GraphClient(host, "database", "graph", authKey)
        let response = graphClient.QuerySingleAsync(query) |> Async.AwaitTask |> Async.RunSynchronously
        let data = CosmosDb.Parse(response.ToString())

        let vertexes =
            data.[0].Objects
            |> Array.map ToVertex
            |> Array.toList

        return vertexes |> List.ofSeq
    }
}
Initially I used the Gremlin.Net package, but it has some quirks like returning a dynamic, which isn’t available in F#. Luckily I found Gremlin.Net.CosmosDb, a nice helper library used in conjuction with Gremlin.Net, that relieved me of all the quirks.
A request looks like:
POST http://localhost:8085/api/ISearchApi/search

{
  "SearchText": "Chuck Norris"
}
And returns the following response:
HTTP/1.1 200 OK
Connection: close
Date: Sun, 1 Dec 2019 11:23:40 GMT
Content-Type: application/json; charset=utf-8
Server: Kestrel
Content-Length: 312

[
  {
    "Type": "cast",
    "Name": "Chuck Norris"
  },
  {
    "Type": "movie",
    "Name": "Good Guys Wear Black"
  },
  {
    "Type": "cast",
    "Name": "Anne Archer"
  },
  {
    "Type": "movie",
    "Name": "Hero at Large"
  },
  {
    "Type": "cast",
    "Name": "Kevin Bacon"
  }
]
With the API up and running, I next turned my attention to the user interface.
Elmish
Elmish is a set of abstractions used to build Fable applications using the Model-View-Update pattern made popular by Elm. Using Fable alone isn’t ideal as frontends are getting more complicated and require structure. The flow of MVU is depicted below:
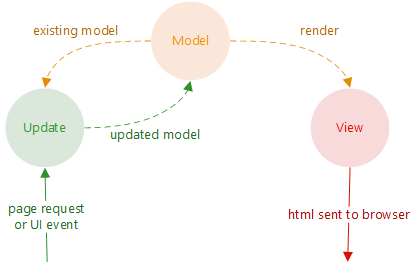
The model defines the state of the application:
type State = {
  SearchResult: List<Vertex>
  SearchText: Option<string>
}
Changes to the state of the application are represented as a discriminated union, which nicely outlines the events that can occur in the application.
type Msg =
  | Search
  | SearchCompleted of List<Vertex>
  | SearchFailed of Exception
  | SetSearchText of string
The update function handles events (messages) and constructs a new state based on the previous state:
let update (msg: Msg) (prevState: State) =
    match msg with
    | SetSearchText text ->
        let nextState = { prevState with SearchText = Some text }
        nextState, Cmd.none

    | Search ->
        match prevState.SearchText with
        | None -> prevState, Cmd.none
        | Some text -> prevState, Server.search text

    | SearchCompleted items ->
        let nextState = { prevState with SearchResult = items; SearchText = None }
        nextState, Cmd.none

    | SearchFailed ex ->
        let nextState = { prevState with SearchText = Some "Failed..." }
        nextState, Cmd.none
The view function renders the view based on the state:
let view (state: State) dispatch =
    let vertexes =
      state.SearchResult
      |> List.map (fun vertex -> renderVertex vertex dispatch)

    let baconNumber =
        state.SearchResult
        |> List.filter (fun vertex -> vertex.Type = "movie")
        |> List.length
        |> string

    let baconNumberText = String.Format("The Bacon Number is {0}", baconNumber)

    div
     [ Style [ Padding 20 ] ]
     [ yield h1 [ Style [ FontWeight "Bold"; FontSize 24 ] ] [ str "Find Bacon Number" ]
       yield hr [ ]
       yield search state dispatch
       yield! vertexes
       yield hr [ ]
       yield h1 [ ] [ str baconNumberText ]
]
The end result:
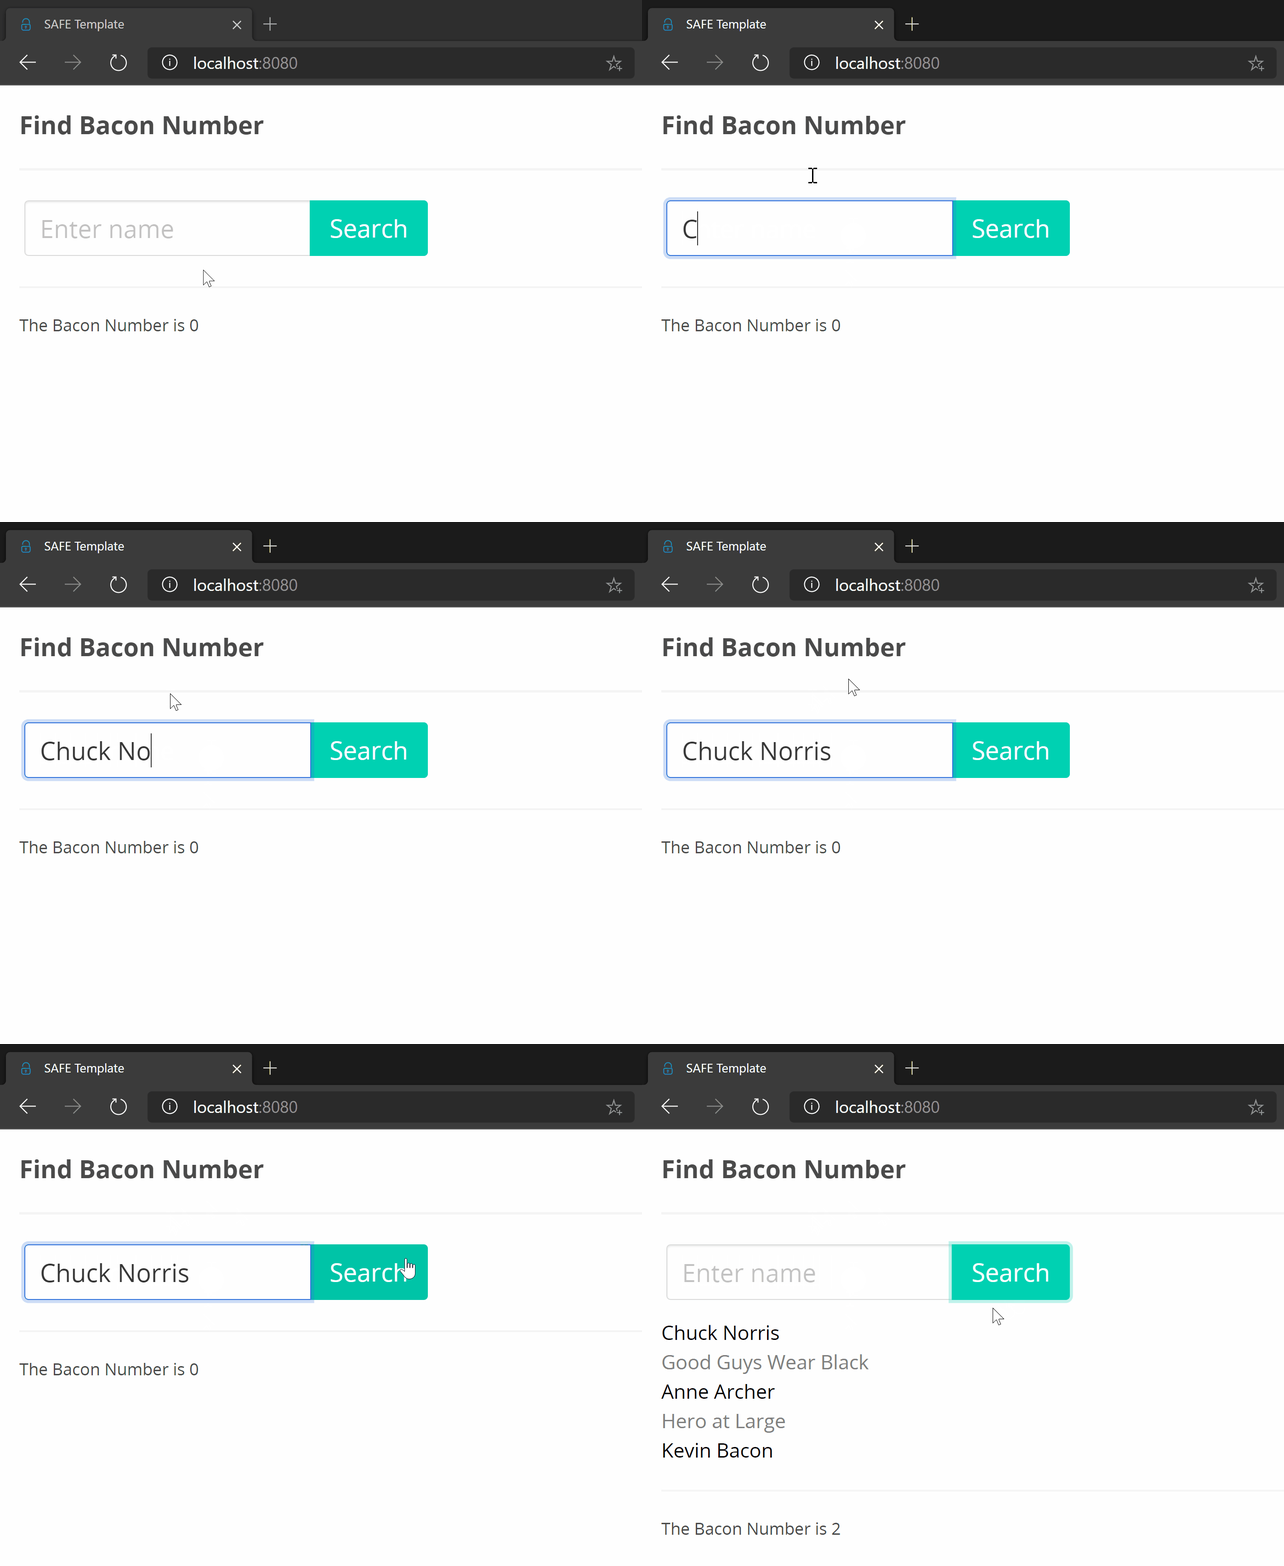
Yes, I know a process indicator would’ve been a nice addition.
Wrapping Up 🎁
Azure Cosmos DB is an impressive service and the use of a graph model instead of a traditional relational database proved to be a good fit. F# is always a joy to write and I was impressed by the SAFE stack and the ability to write everything in F#. Also, the documentation was top-notch.
Finally, I’m pleased to have realized a pet project that I’ve been thinking about for a while 😊 The code is available on GitHub. Note that the data files are zipped due to GitHub’s restriction on file size.
Thanks for reading and Merry Christmas! 🎅