This post is a follow-up to the excellent Enterprise Tic-Tac-Toe by Scott Wlaschin. We’ll continue where Scott left off, transpile his F# to JavaScript using Fable and replace the console interface with a web interface to make it even more enterprisey.
JavaScript is Assembly for the Web
Back in 2011, Scott Hanselman made the analogy that JavaScript is Assembly Language for the Web. The analogy caused a lot of debate, but we’ve since seen the emergence of many transpilers to JavaScript, so with regards to JavaScript is as low-level as a web programming language goes, it appears that Scott was on to something.
A transpiler is a type of compiler that takes the source code of a program written in one programming language as its input and produces the equivalent source code in another programming language.
The advantages (naturally) depend on the transpiler, but some general advantages are additional features and enforcing good practices in the generated JavaScript.
Fable
Fable is a F# to JavaScript transpiler created by Alfonso Garcia-Caro. It brings all the good parts of functional programming to JavaScript development, works directly on F# source code and supports most of the F# core library and some of .NET BCL.
With the release of Fable 1.0 beta (codename narumi), Fable integrates with .NET Core and Webpack. The integration with .NET Core makes it possible to use the .NET Core command-line (CLI) to easily manage Fable projects and with F# being part of the .NET family you get access to a comprehensive core library. Webpack is a JavaScript module bundler already used by many developers and integrating with it has various advantages and allows Fable to focus on creating JavaScript you can be proud of.
If you want to give Fable a quick go, check out the Fable REPL, which runs entirely in the browser by transpiling the F# compiler to JavaScript using Fable. Amazing stuff! 👏
Getting started
The new Template Engine in .NET Core makes it easy to create new templates as well as use existing ones, so let’s install the Fable Template and initialize a new Fable project:
mkdir FablelousEnterpriseTicTacToe
cd FablelousEnterpriseTicTacToe

dotnet new -i Fable.Template::*
dotnet new fable
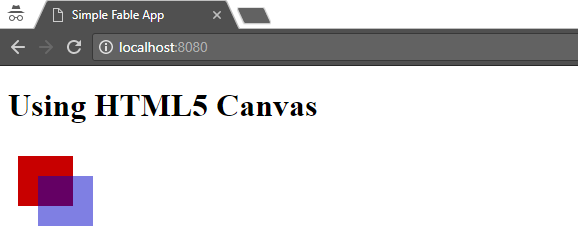
This creates the template Simple Fable App, which is basically the Canvas sample in an updated version and contains the following files:
public\index.htmlWeb page with a reference to the transpiled output,bundle.js.src\App.fsF# code that is transpiled tobundle.js.FablelousEnterpriseTicTacToe.fsprojF# project file.package.jsonNode.js manifest.README.mdMarkdown file typically included in projects as an introduction.webpack.config.jsWebpack configuration.
As Fable is a hybrid of a .NET and Node.js application, we restore/install dependencies specified in FablelousTicTacToe.fsproj and package.json respectively:
dotnet restore
npm install
Finally, we transpile and start a web server running the Simple Fable App:
dotnet fable npm-run start
The app can be viewed in a browser by going to http://localhost:8080.
Adding a web interface
With Fable up and running, we’re now ready to continue where Scott Wlaschin left off. In src\App.fs, we keep the module declaration and add an import declaration, Fable.Import.Browser, which contains the browser-related code:
module FablelousEnterpriseTicTacToe

open Fable.Import.Browser
Everything else is replaced with with the modules TicTacToeDomain and TicTacToeImplementation from enterprise-tic-tac-toe-2.fsx. The modules ConsoleApplication, ConsoleUi and Logger are not needed as we’re replacing the console interface with a web interface.
If the Fable server is still running, the code will automatically be transpiled upon saving (hot reloaded). Otherwise re-run dotnet fable npm-run start. So, Fable just took about 250 lines of F# code never intended for running in the browser and transpiled it to JavaScript. Magic! ✨
CSS Grid Layout
For the web interface we’ll use CSS Grid Layout, which is a layout system that after a long journey finally is available in all major browsers. It’s a two-dimensional grid-based system, and as such, it fits perfectly for constructing our Tic-Tac-Toe board, which is basically a grid of 3 x 3 cells.
In public/index.html, we add the following HTML to represent the board. A parent div, Board, and 9 child divs with ids corresponding to their position on the board. The ids are identical to the discriminated union values used in the F# code and are used for referencing the divs from the code.
<div id="Board">
    <div id="LeftTop"></div>
    <div id="HCenterTop"></div>
    <div id="RightTop"></div>
    <div id="LeftVCenter"></div>
    <div id="HCenterVCenter"></div>
    <div id="RightVCenter"></div>
    <div id="LeftBottom"></div>
    <div id="HCenterBottom"></div>
    <div id="RightBottom"></div>
</div>
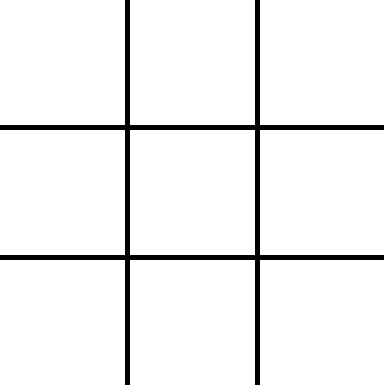
In the stylesheet, we specify that the board is to be displayed as a grid of 3 columns with a width of 100 pixels and 3 rows with a height of 100 pixels, and a gap of 4 pixels between each cell.
#Board {
    background-color: black;
    display: grid;
    grid-template-columns: repeat(3, 100px);
    grid-template-rows: repeat(3, 100px);
    grid-gap: 4px;
    width: 308px;
}

#Board > div {
    background-color: white;
}
The result is a board that looks like this:
We also add some additional styling, a button for (re)starting the game, NewGameButton and a div element for displaying the status of the game, GameStatus. More about this in the next section.
Interaction
We follow the approach in the original code, but instead of ConsoleApplication and ConsoleUi we’ll have WebApplication and WebUi.
We add a click event listener to the NewGameButton element, which calls the WebUi.startGame function with TicTacToeAPI as an argument. The last line initializes the game when visiting the web page.
module WebApplication =

    let newGameButtonClick() =
        let api = TicTacToeImplementation.api
        WebUi.startGame api

    let newGameButton = document.getElementById("NewGameButton") :?> HTMLButtonElement
    newGameButton.addEventListener_click(fun _ -> newGameButtonClick(); null)

WebApplication.newGameButtonClick()
The WebUi.startGame function calls TicTacToeAPI.newGame, which returns a MoveResult that is the result of a move and includes game state and capabilities for the next move, if any. Read Enterprise Tic-Tac-Toe, part 2 to learn more about the capability-centric approach. Next, the gameLoop function is called with TicTacToeAPI and MoveResult as arguments.
module WebUi =

    // ... more code ...

    let startGame api =
        let moveResult = api.newGame()
        gameLoop api moveResult
The gameLoop function is called continuously during gameplay and is defined as a recursive function. When using recursive functions one should be cautious of stack overflow, but in our case the nested number of calls is guaranteed to be small, so not a problem. The MoveResult is matched to determine if the game is tied, won or it is either Player X or O to move. All matches update the GameStatus element, (re)display the board and remove all listeners. If either Player X or O to move, listeners are added for the possible moves.
    let rec gameLoop api moveResult =

        // ... more code ...

        match moveResult with
        | GameTied displayInfo ->
            document.getElementById("GameStatus").innerText <- "Game Tied"
            displayInfo |> displayCells
            removeListeners
        | GameWon (displayInfo, player) ->
            document.getElementById("GameStatus").innerText <- "Game Won by " + getUnionCaseName(player)
            displayInfo |> displayCells
            removeListeners
        | PlayerOToMove (displayInfo, nextMoves) ->
            document.getElementById("GameStatus").innerText <- "Player O to move"
            displayInfo |> displayCells
            removeListeners
            nextMoves |> List.iteri (fun i moveInfo -> addListener moveInfo.posToPlay nextMoves i)
        | PlayerXToMove (displayInfo, nextMoves) ->
            document.getElementById("GameStatus").innerText <- "Player X to move"
            displayInfo |> displayCells
            removeListeners
            nextMoves |> List.iteri (fun i moveInfo -> addListener moveInfo.posToPlay nextMoves i)
The displayCells function displays the board. It retrieves DisplayInfo, which contains the state of all cells, as an argument. For each cell the innertext of the corresponding div is set to either X, O or empty (if not played). getUnionCaseName is a function for getting the name of a union case and getIdByCellPosition is a function to get the id of a cell position in order to reference cells (divs) from the code.
        let getUnionCaseName (e:'a) = (FSharpValue.GetUnionFields(e, typeof<'a>) |> fst).Name

        let getIdByCellPosition cellPosition =
            let horizPosition, vertPosition = cellPosition
            getUnionCaseName(horizPosition) + getUnionCaseName(vertPosition)

        let displayCells displayInfo =
            let cells = displayInfo.cells
            let cellToStr cell =
                match cell.state with
                | Empty -> ""
                | Played player ->
                    match player with
                    | PlayerO -> "O"
                    | PlayerX -> "X"

            cells |>
                List.iter (fun cell ->
                    let id = getIdByCellPosition cell.pos
                    document.getElementById(id).innerText <- cellToStr cell)
The easiest way to remove all event listeners on the board is to clone the Board element, which will remove all event listeners, and replace the Board element with the clone:
        let removeListeners =
            let oldElement = document.getElementById("Board")
            let newElement = oldElement.cloneNode(true) :?> HTMLDivElement
            oldElement.parentNode.replaceChild(newElement, oldElement) |> ignore
If either Player X or Player O’s turn to move, an event listener is added for all possible moves. The attached play function constructs a new MoveResult and calls gameLoop to continue the game.
        let getCapability selectedIndex nextMoves =
            if selectedIndex < List.length nextMoves then
                let move = nextMoves.Item selectedIndex
                Some move.capability
            else
                None

        let play (nextMoves : NextMoveInfo list, nextMoveIndex) =
            match getCapability nextMoveIndex nextMoves with
            | Some capability ->
                let moveResult = capability()
                gameLoop api moveResult
            | _ -> failwith "Capability not found"

        let addListener cell nextMoves i =
            let id = getIdByCellPosition cellPosition
            let element = document.getElementById(id)
            element.addEventListener_click(fun _ -> play (nextMoves, i); null)
Wrapping up
We took F# code never intended for the browser and added a web interface also written in F# to create a tic-tac-toe game that can be played in the browser. All this without writing a single line of JavaScript. Thanks to Scott Wlaschin for the original code and to Fable for making web development great again.
The source code is available at FablelousEnterpriseTicTacToe and you can try out the game below.